DIY Reverse Osmosis Water Filter

Is A DIY Reverse Osmosis Water Filter Worth It?
If you're worried about what's in your tap water, a RO water purifier could be the solution. Drinking water that is free of chlorine, sediment, and other contaminants is possible with the help of a reverse osmosis water purifier. But did you realize that the average person can construct a DIY reverse osmosis water filter?
The method of reverse osmosis uses a semipermeable membrane to filter out contaminants in water. The semipermeable membrane permits water molecules to travel through but prevents the passage of larger contaminants like minerals and chemicals. Clean, drinkable water can be obtained through the process of reverse osmosis. Although RO systems are most often found in industrial environments like water treatment facilities, they are increasingly being installed in private homes as well. Water is forced through a semipermeable barrier via pressure in reverse osmosis. The membrane's microscopic holes let water molecules through but trap any contaminants that might be present.
Now that you know the fundamentals of reverse osmosis, we'll go over how to construct your DIY reverse osmosis water filter at home. You'll need:
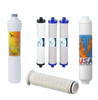
- A Reverse Osmosis Membrane
- Membrane Housing
- Sediment Filter & Carbon Filter
- Pressure Gauge
- Storage Tank
- Tubing
- Wrenches
- A Drill
The Best DIY Reverse Osmosis Water Filter
Installing the sediment filter is the first stage in constructing a reverse osmosis water filter. Before the water enters the reverse osmosis membrane, it goes through a sediment filter, which removes any larger particles. The sediment filter comes with a mounting device that you can use to set it up on a wall. Then, using the correct tubing and fittings, attach the filter to the water source. The carbon filter comes with a mounting device that you can use to set it up on a wall. Then, using the correct tubing and fittings, attach the filter to the water source. First, using the included bracket, mount the membrane container to the wall, which will house the reverse osmosis membrane. Then, following the membrane's installation directions, place the membrane inside the housing.
The pressure in the DIY reverse osmosis water filter system is monitored by the pressure indicator. Clean water is kept in the reservoir for later use. Connect the pressure gauge and storage tank to their respective openings on the reverse osmosis unit to complete the installation. Tubing and connectors should be used to complete the connections. Turn on the water and look for leakage after you've finished installing everything. Then, power up the RO unit and double-check the pressure indicator to ensure everything is running smoothly.
For the reverse osmosis device to function properly, the water pressure must be just right. Make sure your water source is at least 40-60 psi, as this is the standard for most DIY reverse osmosis water filter systems. The water's initial condition should be taken into account as well. To avoid the filter getting clogged with mineral deposits, for example, a water softener may need to be installed ahead of the reverse osmosis system.
Filtration changes are an integral part of DIY reverse osmosis water filter maintenance. Reverse osmosis membranes may need to be replaced every two to three years, while sediment and charcoal filters only need to be swapped out every six to twelve months. Regular cleaning and disinfection of the reverse osmosis device is also crucial. This can maintain your system free of bacteria and running smoothly.